
How to sketch a 911


With so much of the world urged to stay home and save lives during the current crisis, Porsche has launched a new series of automotive masterclasses designed to help you sharpen your skills from the comfort of your homes. Under the title of #GetCreativeWithPorsche, the team has picked the brains of some of the automotive world’s most creative and talented people, from Michael Mauer, Head of Style at Porsche to car-valeter-turned-accidental-influencer Richard Tipper. The aim has been to create a series of guides that will enable enthusiasts to polish their skills in a number of disciplines, including car photography, design, detailing, art and even driving. All while staying at home and adhering to social distancing rules.
Here we look at Michael Mauer, a man never without a notebook. In meetings, he is always drawing and doodling. It may sound like a cliché, but the man in charge of design at Porsche since 2004 lives and breathes design. During lockdown, his thumbnail sketches are piling up faster than ever and here he talks through how to draw the greatest Porsche icon – the 911, step-by-step.

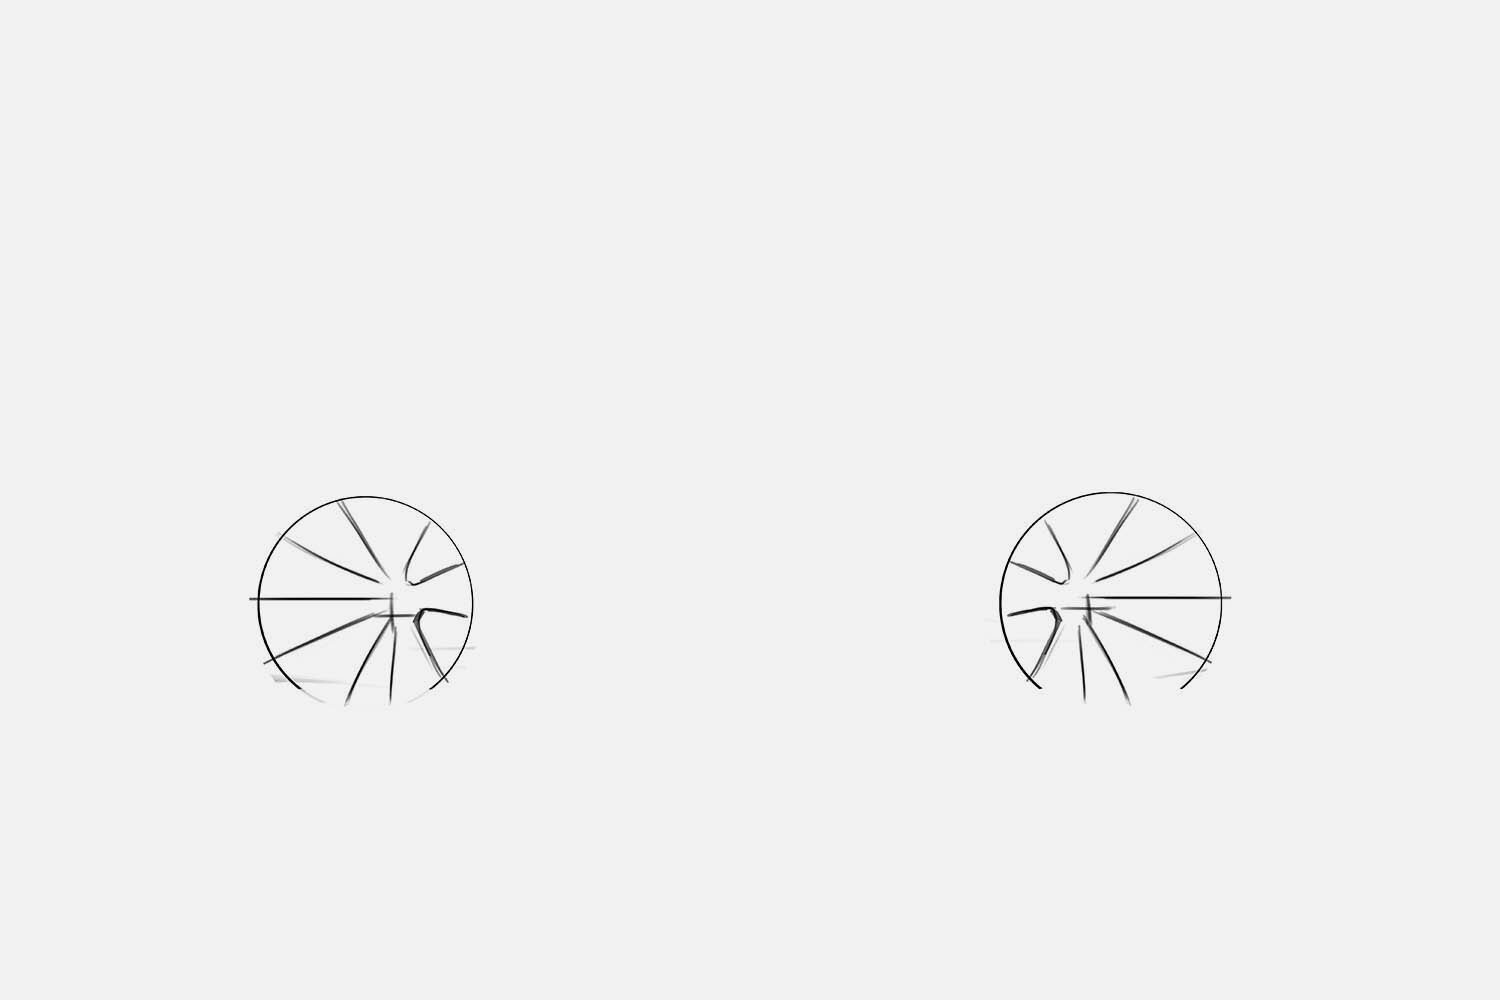
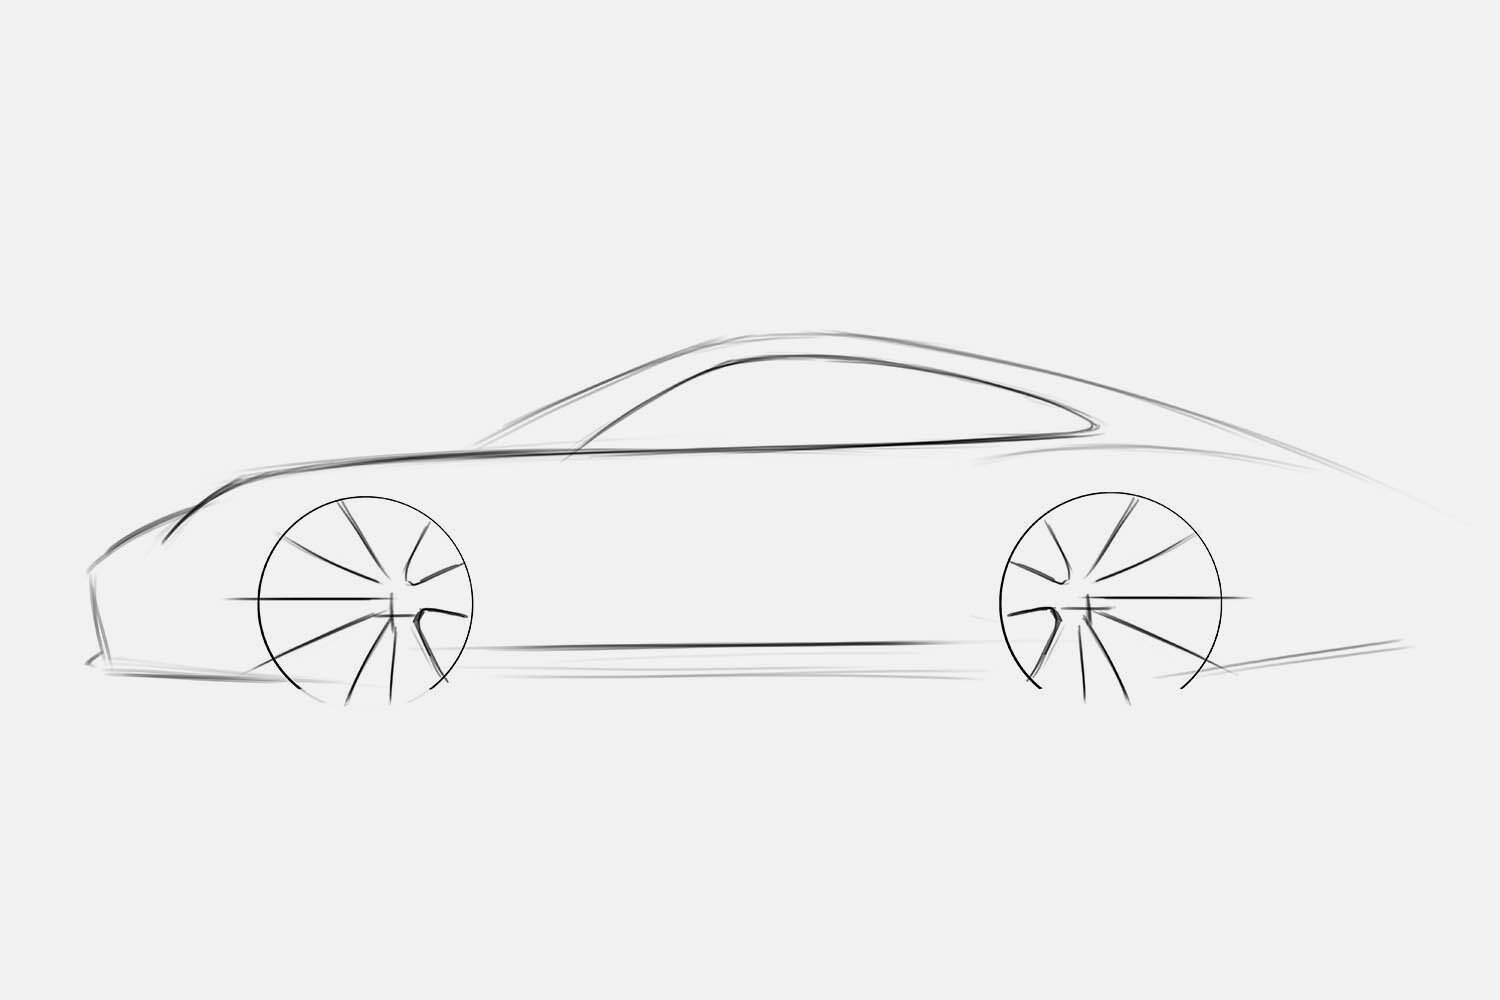
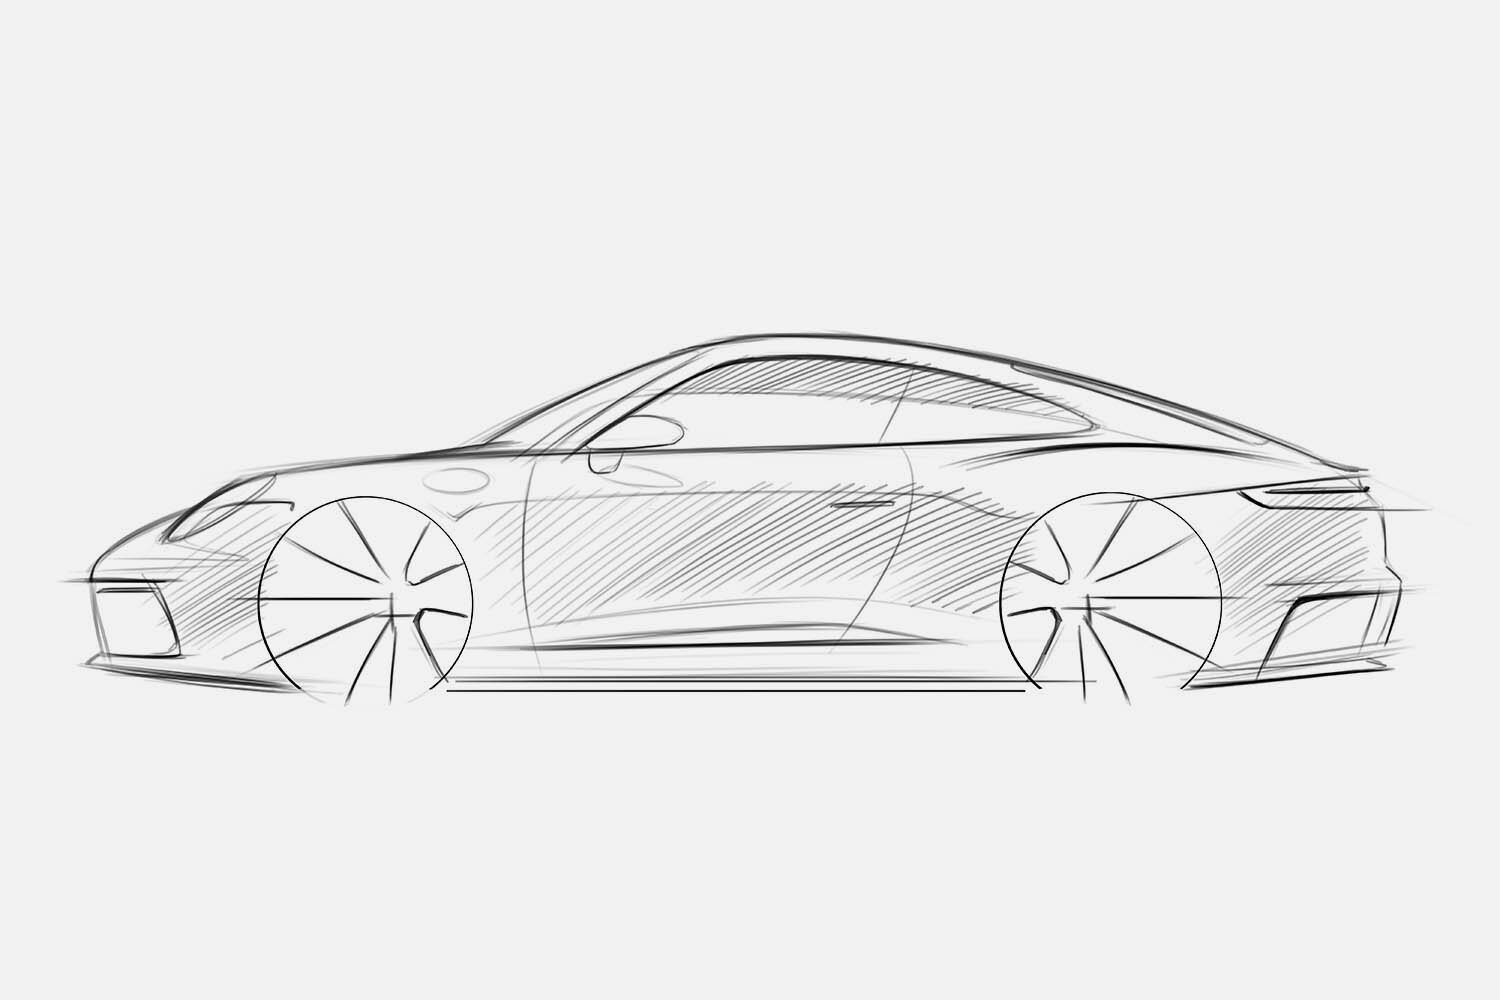
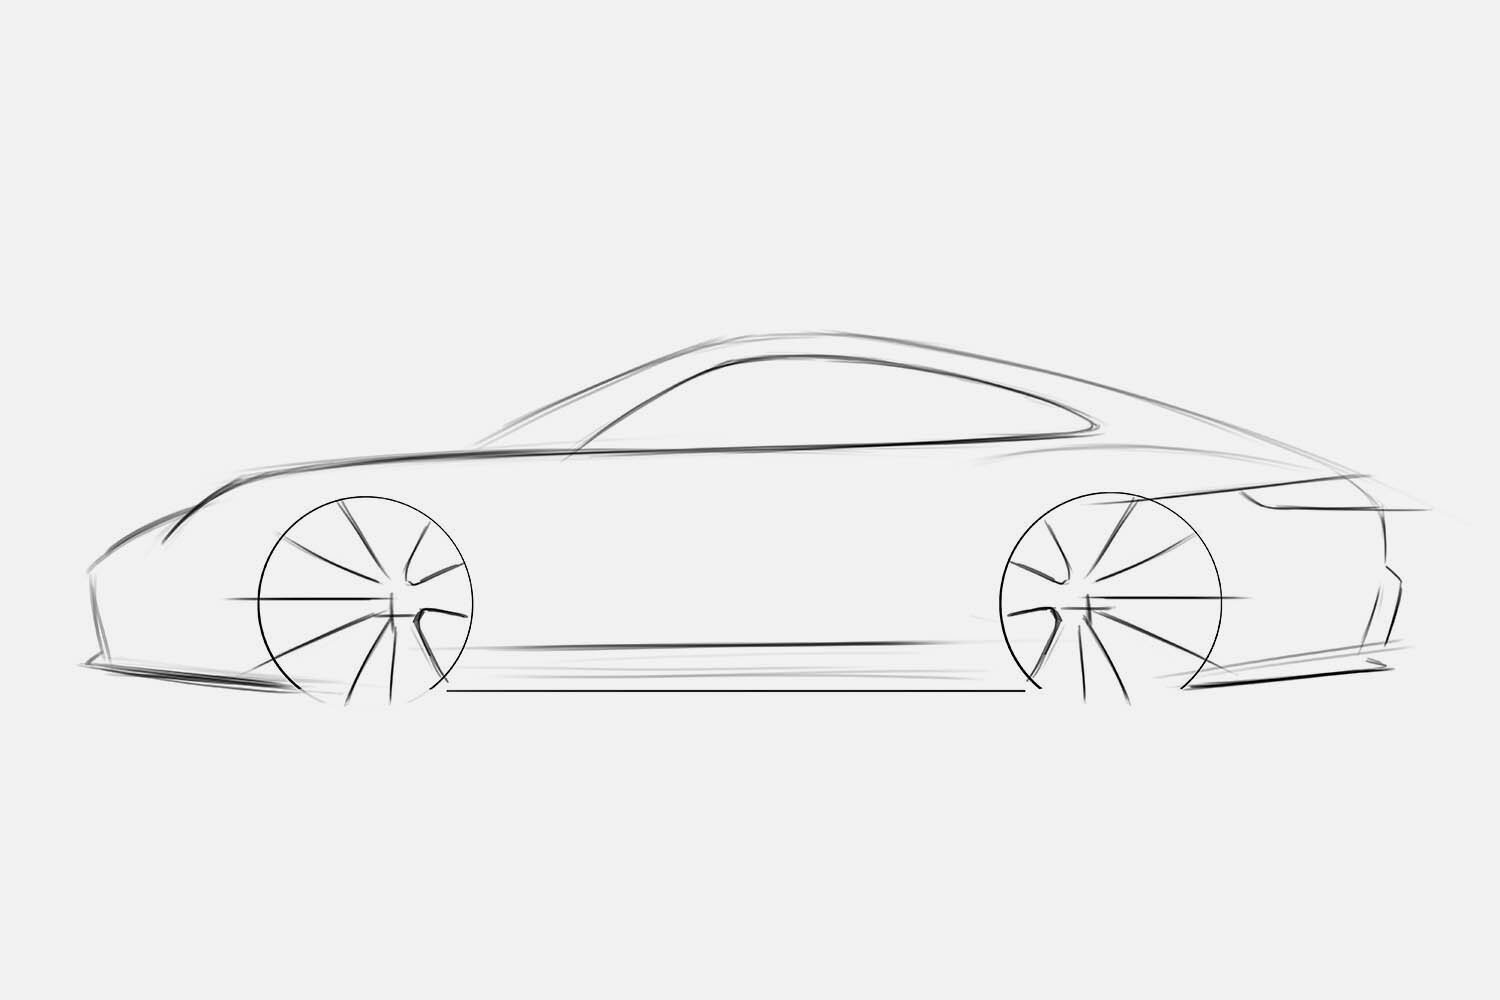
If you asked ten car designers to explain this process of sketching you would get five different approaches. Some designers start with both wheels, some start with the front wheel and then start to sketch the front of the car and put the second wheel in later. You can approach it however you choose but I always start with both wheels because one of the challenges of drawing a car is defining the wheelbase and the correct proportions. You have to have an idea of where the rear wheel is supposed to be. With this method, I sometimes continue to sketch and realise the rear wheel is in the wrong position so I erase it and start again. When you draw your wheels it is up to you whether you start with two simple circles or add a little more: in this case I’ve started to think about the idea of a five-spoke wheel.

Once your wheels are in place, the next step is to put the car on the ground: draw the line between the wheels. From there, you can start to build up the outline. Designers and engineers talk about the “Y zero section”, which basically means the silhouette. It is very iconic in the case of the 911. Sometimes you’ll find the silhouette and the wheelbase don’t match, and you have to think about moving the rear wheel but that’s no problem: that’s why we have erasers.
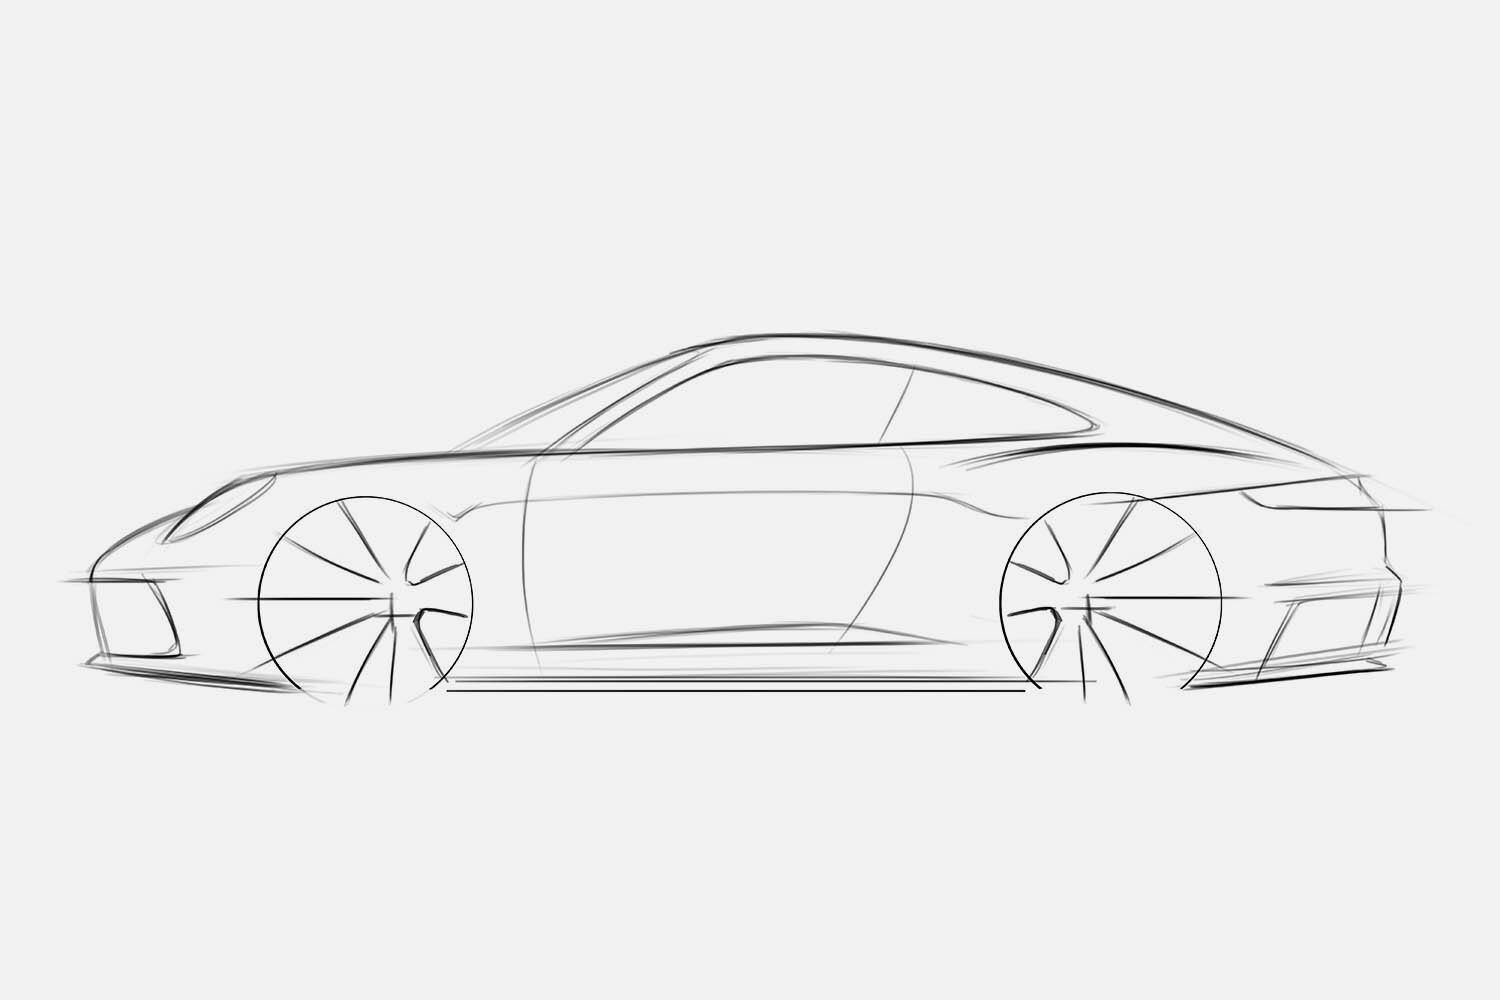
Gradually we are beginning to add details, step-by-step. Designers often refer to the window as the DLO: the daylight opening. I think this term was invented so that we could have conversations no one else would understand. The DLO on the 911 is iconic and very different to a Cayenne or a Panamera, since they are four-seaters. This is one of the first details I add, followed by the front headlamp, and then more detail at the rear end. You can see the shape of the bumper has been added, and the rear lamp.

Sketching a car is all about adding layers, gently adding more detail. The biggest challenge is always to stop sketching: sometimes a sketch is nicer when you apply the “less is more” principle. At this stage, the headlamp is now ellipse. I’ve added the lower air intake and the bottom of the door is starting to show more shape. Note the air outlet in the lower area of the bumper and the detail on the rear fender. I’m trying to create a feeling of a strong rear shoulder. There’s a very fine line between the wheels now, just below the belt line. It’s very fine and doesn’t exist in the previous image. This very fine line gives the side – the surface between the wheels – a more three dimensional feel. It’s not an accident that this very fine line, when it comes closer to the rear wheel, is dropping. It doesn’t mean that on the final product the line drops, it’s just a way of visualising and giving the person that’s looking at the side view an impression of how the car might look in the flesh. If you look at the 911 from above, the rear track of the car is a little wider and these fainter lines help to indicate this.
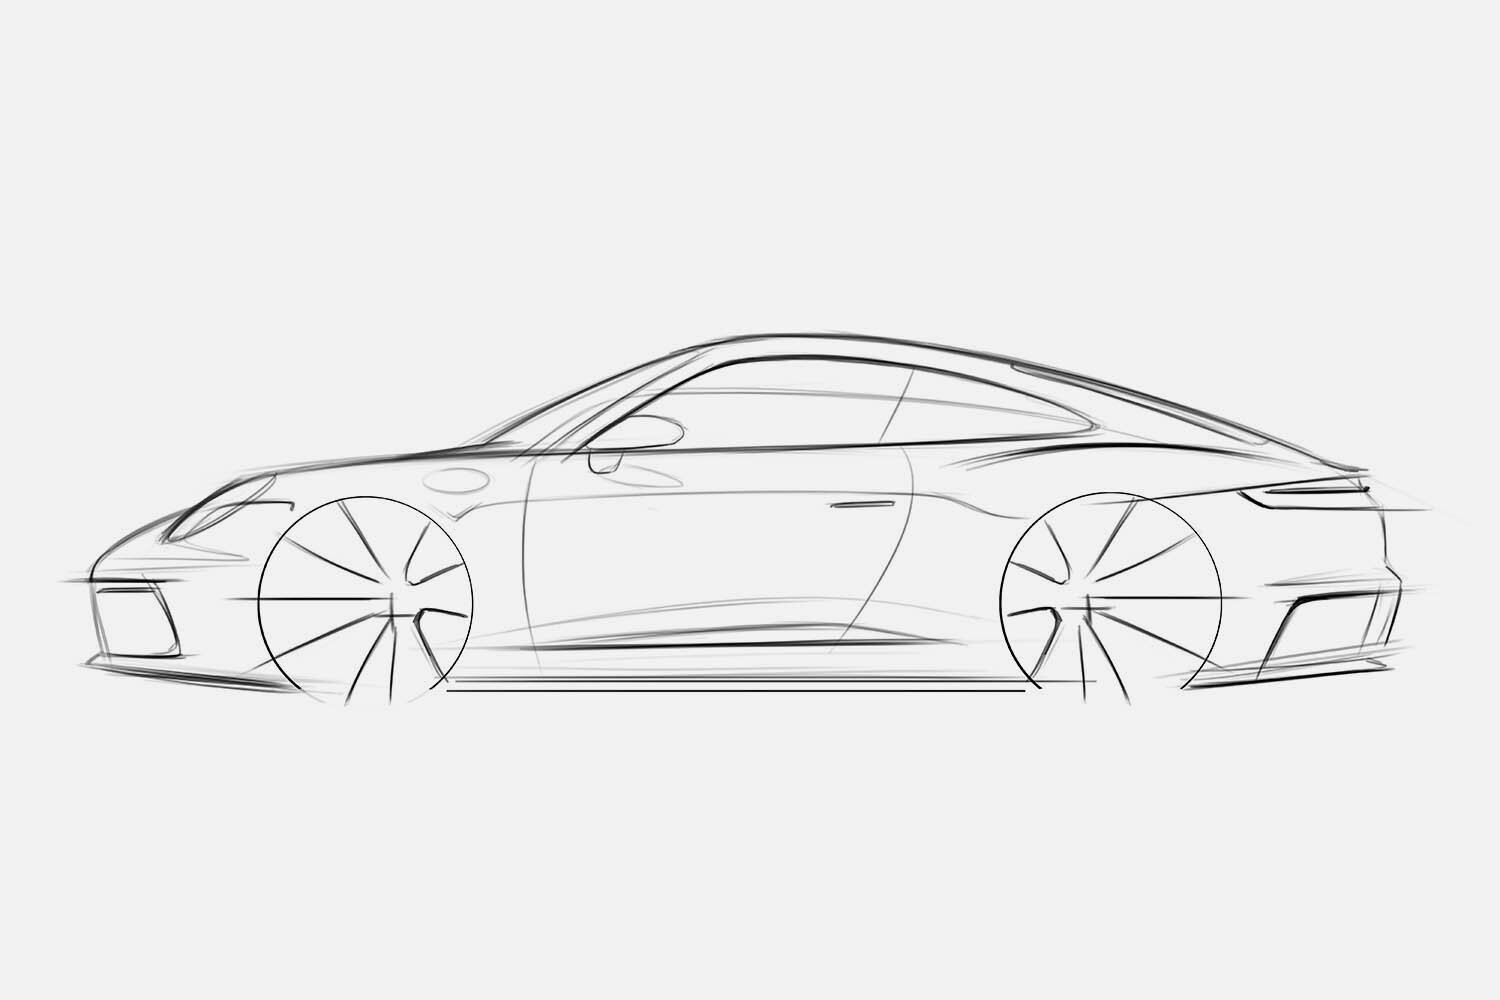
You’ll see we are adding more and more detail at this stage. The door handle is there, along with some more lines of varying thickness, to add or remove emphasis. It is all about creating a three dimensional feel. If you are able to, park your car against a nice background and take a photograph of it. You’ll see lines that indicate the positive and the negative surface treatment. Try to imitate those lines in your drawings and it will help to bring your sketch to life.

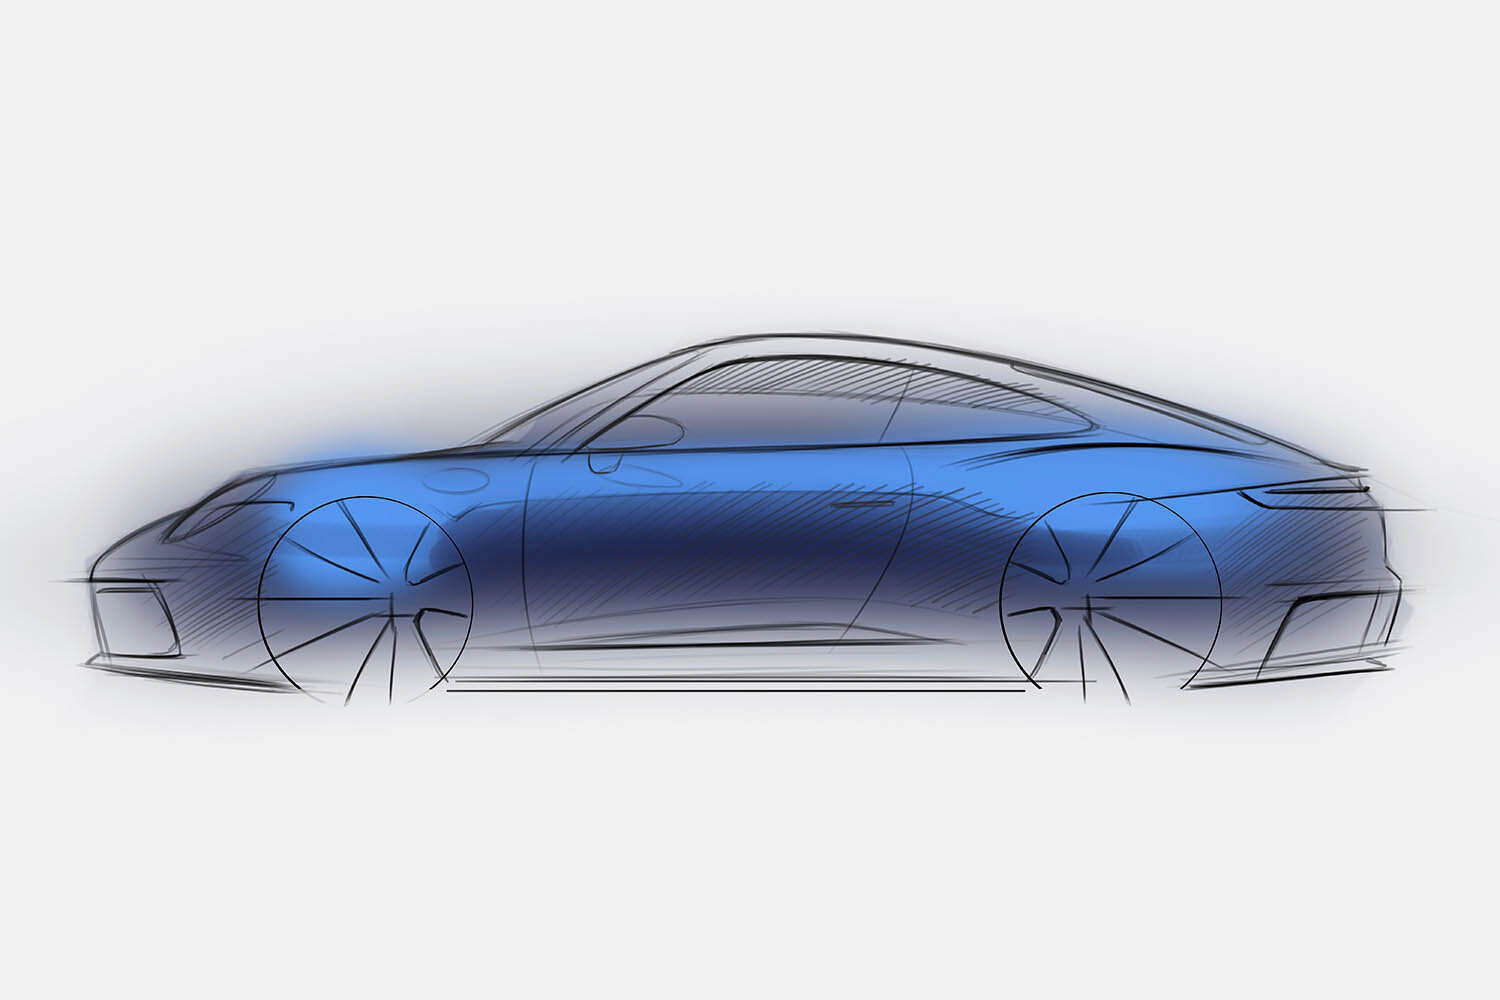
The first five sketches have been lines but now it’s time to add shadow and contrast. The shoulder is still completely without colour because we want to give the impression that this is reflecting light. Study photographs of cars and look at the areas that are highlighted, and which areas fall into shadow.

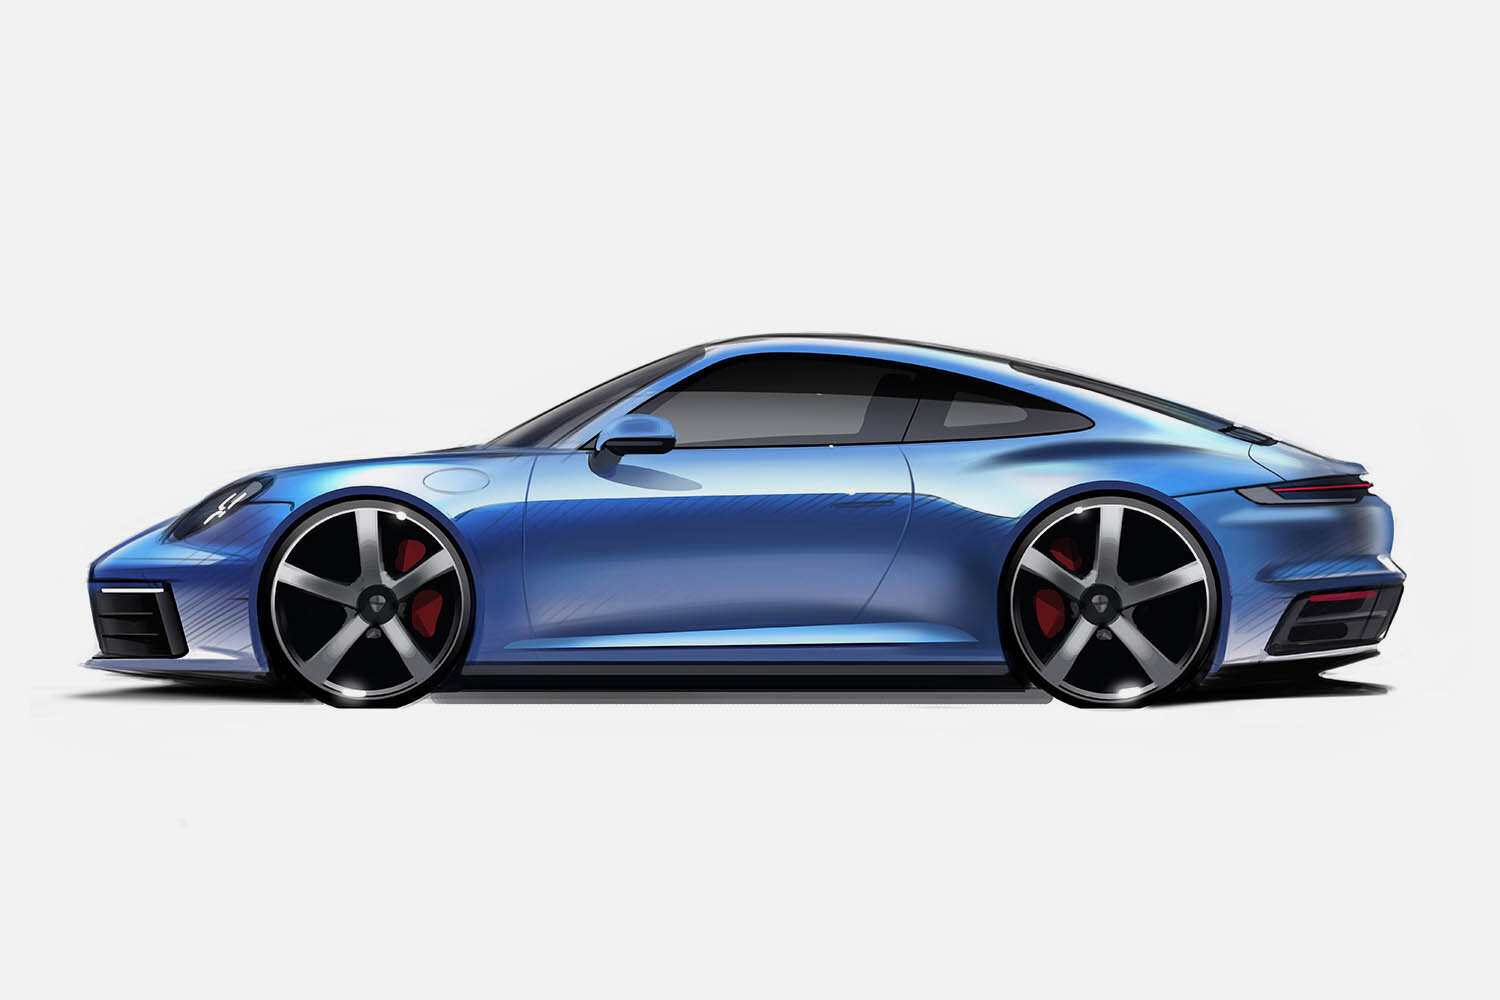
The next step is fun: it’s where we start to add colour and bring everything together. If you work with Photoshop it’s like adding another layer. The blue colour on the upper part of the car reflects the sky, while below the line, where it’s darker, we reflect the floor. This creates the impression of the car being grounded. You don’t need Photoshop – I’m actually not very good with it – try using watercolour paint or crayons. When I am sketching it is often in a meeting, and I only have a pencil and paper with me.

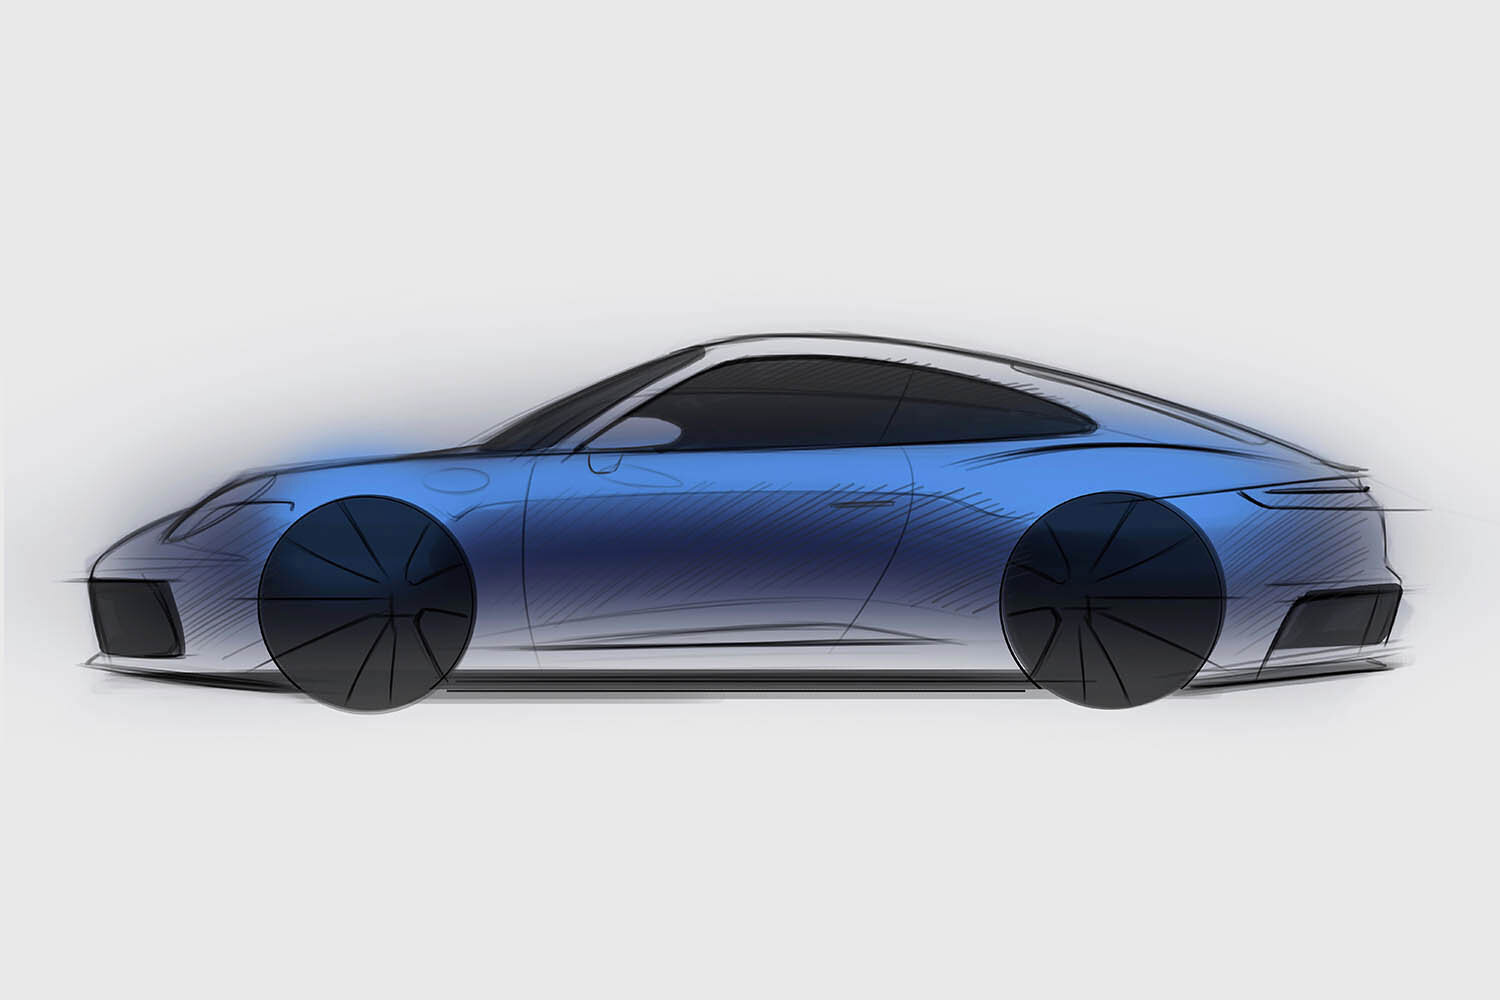
Each designer has their own way of treating glass but I like to colour it black at this stage, and the same with the wheels. We can add highlights in the next step. I usually draw thumbnail-sized sketches. When you’re starting out you might find it easier to do the same as you have more control.

Consider here the DLO – the daylight opening. Here the side window is split, so that the upper part is black, and the lower part is lighter. This creates the impression that there is curvature. On very old cars the glass surface was completely straight but the side windows now have a curve in the glass. You can demonstrate this with a subtle change in colour. The rendering stage takes the drawing from a pencil sketch to something much more sophisticated.

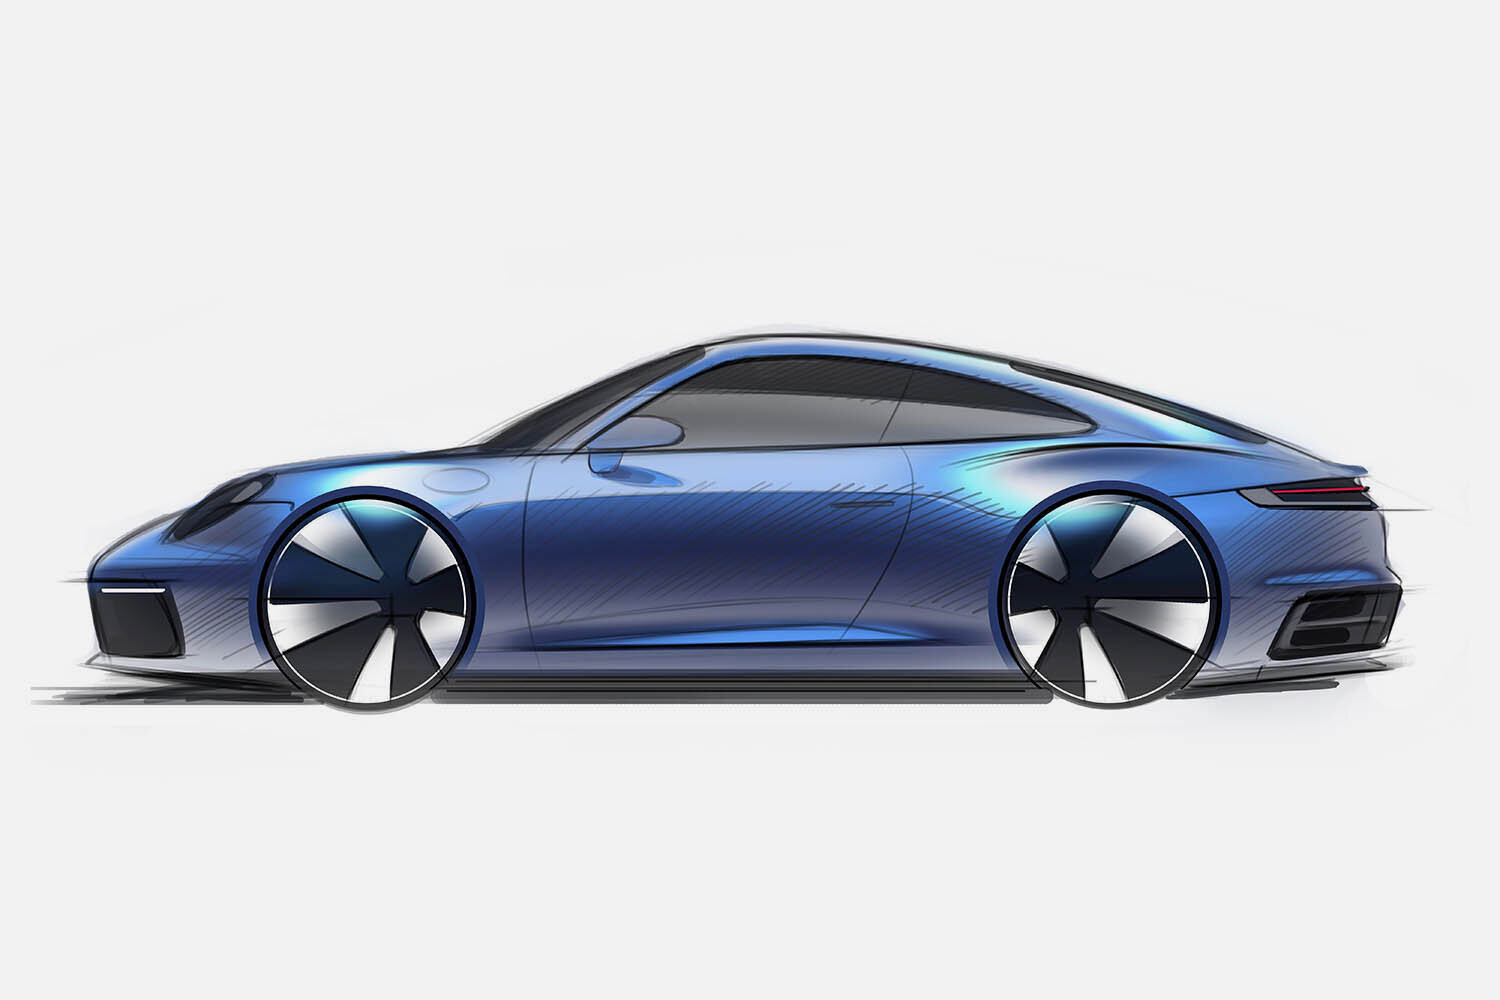
When you’re working on paper, in one dimension, you need to apply tricks using colour and shade to create depth and an impression of the final, three dimensional product. Look again at the photo you took of your car. Look at where you can see through the glass, or where the bodywork shows reflection. This changes, depending on where your car is parked but it’s useful to study how shadow appears on the different surfaces. Here, we use white paint to lift key areas, and a little colour is creeping into the lights and callipers. Consider adding a steering wheel. Or maybe you can see part of the seat.